
When we talk about cityscape photography, what we always try to achieve is an image on lit city with nice sky in the background, but, most of the time when we look at the back screen of the camera it doesn’t look as good as we thought it would be. I would love to share my techniques from shooting to post-processing that I always use to create my cityscape photographs.
Composition
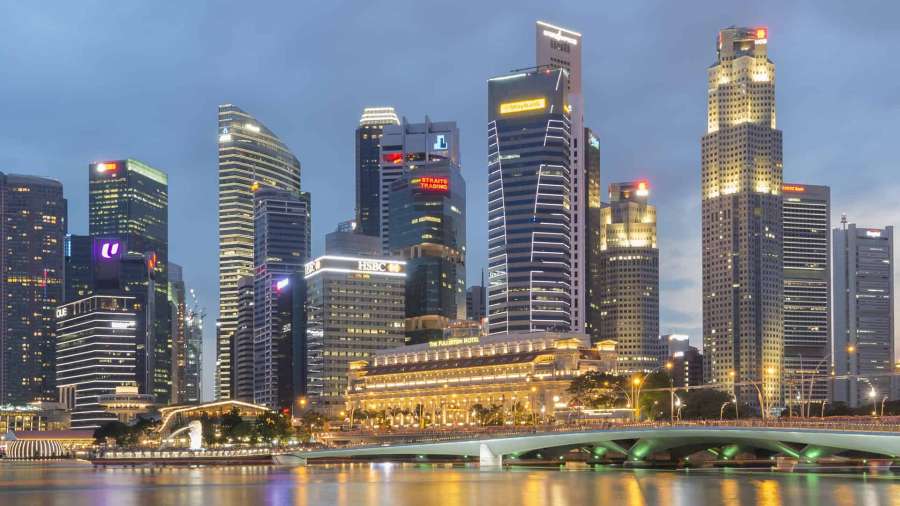
When I arrive at a location, the first thing I would do is walk around the area and choose the best spot considering clouds in the sky, overlapping buildings, height of buildings. In the sample image I chose to shoot this skyline at the angle where the buildings create some sort of triangular shape, then proceed to use the rule of third for water, subject, and the sky.

Shooting
Most of the time, I carry a tripod with me for 2 reasons. First, I often shoot cityscape during blue hour where the sky has beautiful soft colour and that comes with low light, therefore, tripod is needed. Second, I shoot with exposure bracketing mode to ensure that I have all details in highlight and shadow and to blend all exposures perfectly the camera needs to be still throughout, therefore, tripod is a must. In this case I use 2 RAW files for this particular shot.

Basic Adjustments: Lens Correction
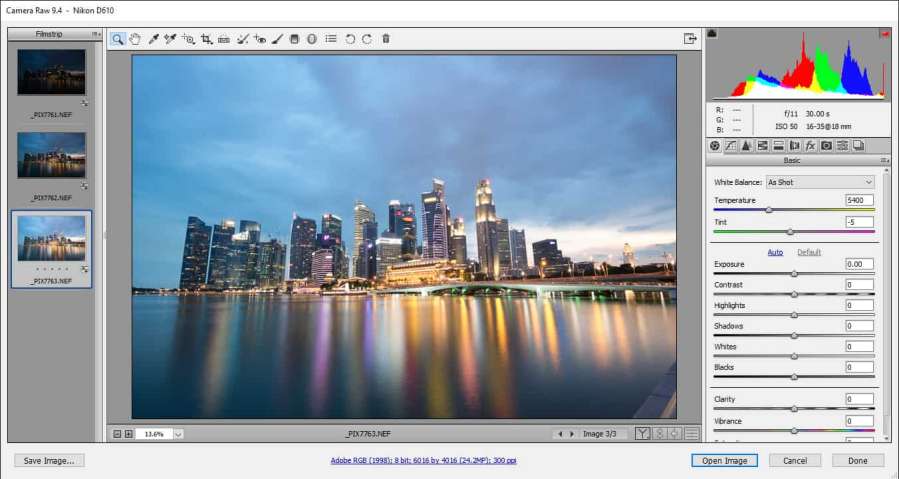
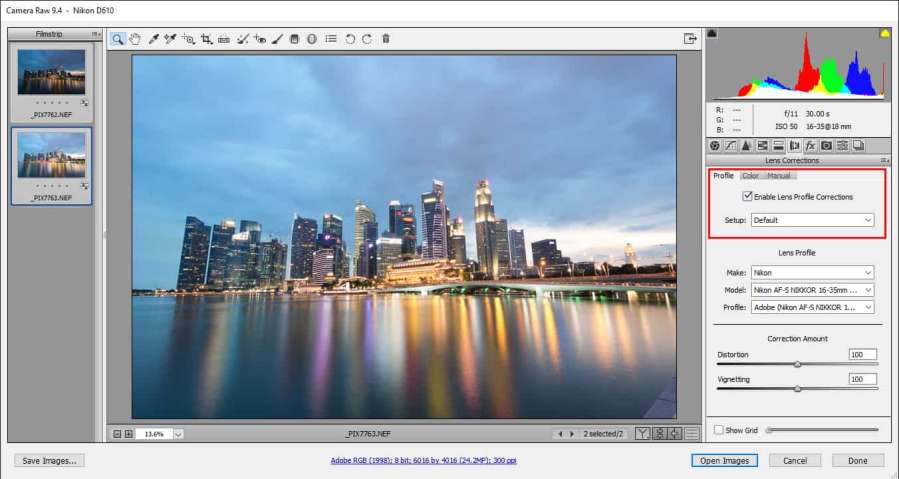
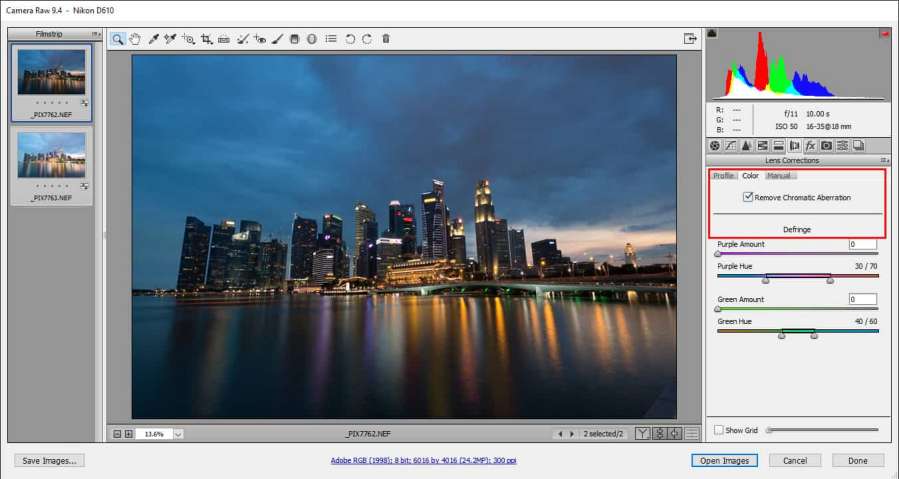
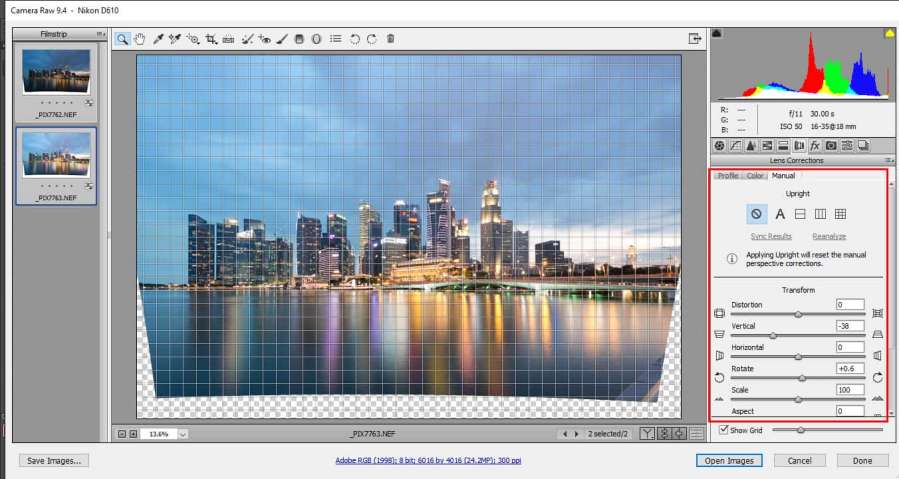
I then proceed to adjust these RAW files in Adobe Camera Raw. You can use Adobe Lightroom as well as they are very similar. In cityscape and architectural photography, it is crucial to have little to none distortion and perspective problems. In these software, you can automatically correct your distortion, chromatic aberration (purple edge on highly contrast area), and manual distortion for perspective correction. While shooting, I tilted the camera up a little so I will have to reduce ‘Vertical’ on manual adjustment. Make sure you correct two files together to avoid any misalignment or you can copy all setting values from one to another.
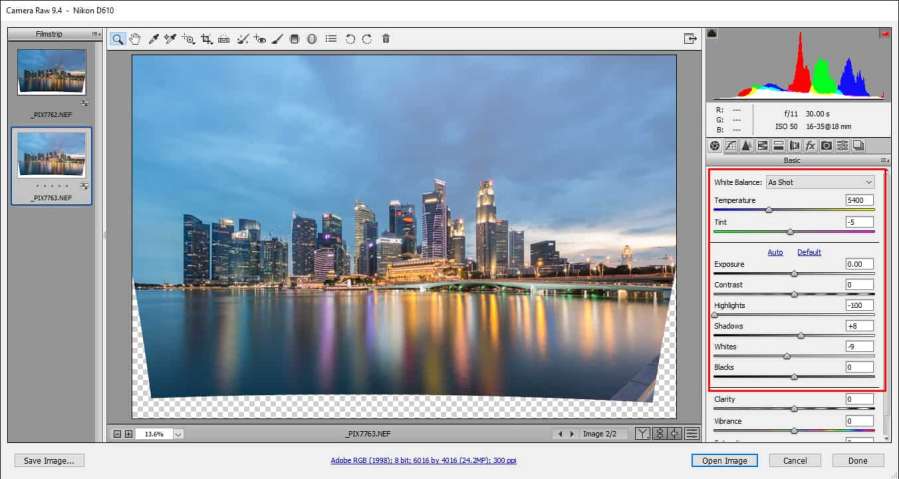
Basic Adjustment: White balance, Highlight, Shadow
Before bringing the files into Adobe Photoshop, I make sure that all RAW files are at their best conditions. First, ensure that both files have the same white balance value. Second, regain detail in highlight and shadow as much as possible.
However, do not go so far the the image look completely flat especially the one that you want to use as the base or the more properly exposed one. In this case, the brighter exposure.

Blending exposure
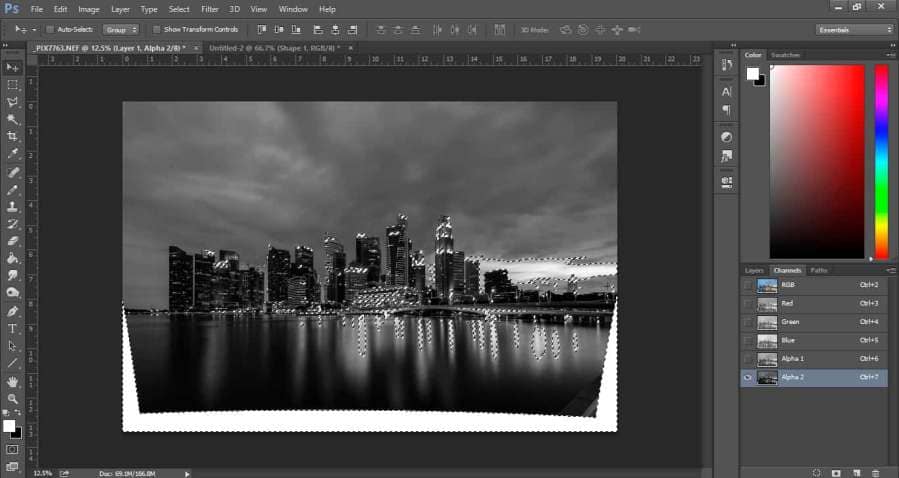
To create luminosity mask there are many tutorials on YouTube that can explain more clearly so I will not focus on that here.
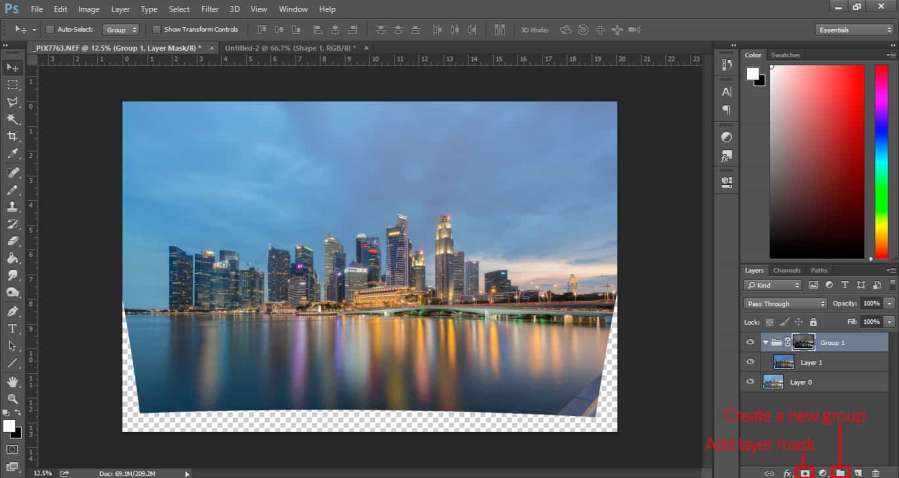
After I get a luminosity mask I find most suitable with my image (the one that properly cover the highlight area without interfering with other parts of the image), Ctrl+click on that mask to have a selection. Go back to Layer tab and unhide the darker exposure, drag it down to “Create a new group” icon to put it in a folder, then click on “Add layer mask” icon to create a layer mask.
It now appears that the highlights are toned down, which is great, but there are areas that I prefer them to remain bright, for example the sky. Select layer 1 and add black layer mask (Alt+click on “Add a layer mask”) to, first, opt out all the adjustment, then we can use white brush to manually paint in the areas we want the highlight to be toned down.
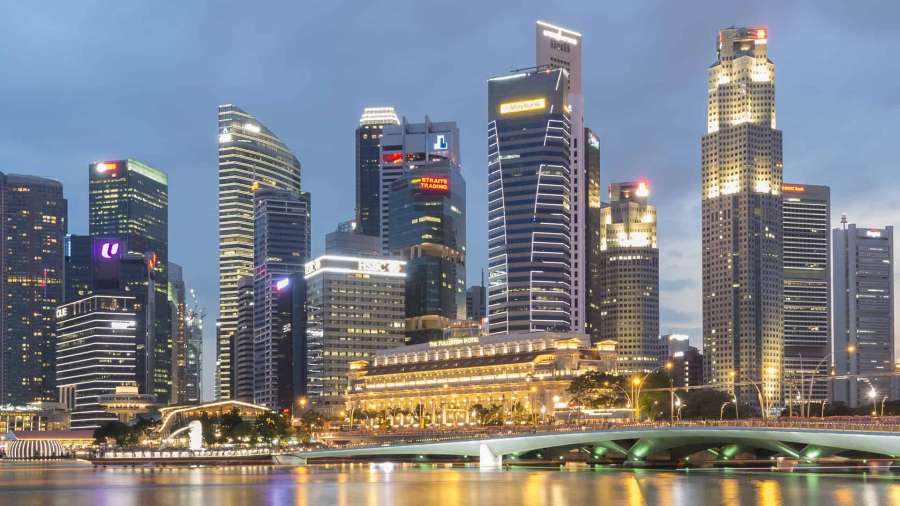
Review the Work
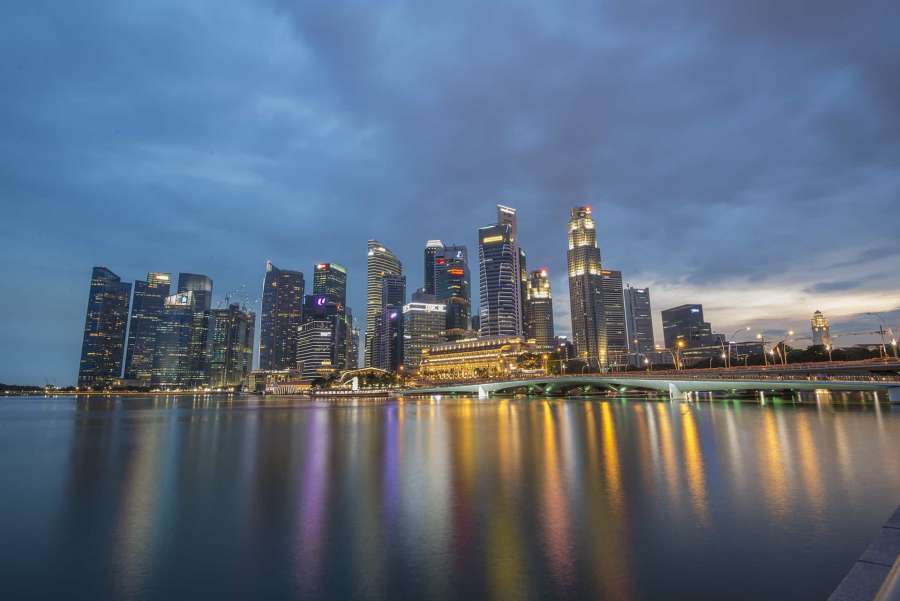
Let’s look at the result of the exposure blending for how much does it recover blown out highlights.
We regained more colour in those lights on the building and the overall picture is now less intrusive for the viewers. From here we can go to next step to finish up the work.
Finishing Up
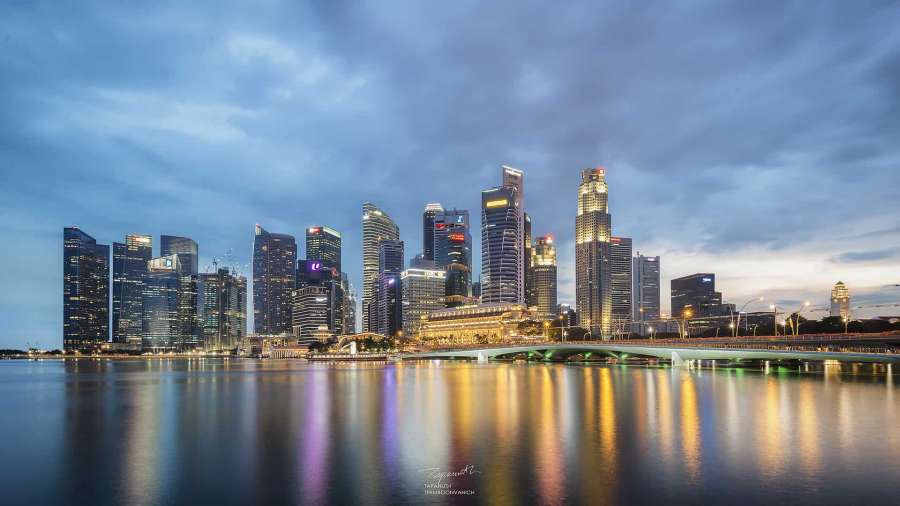
After I have blended two exposure and acquire a realistic HDR image, I usually finish it up with Nik Collection (you can download for free on Google) with Pro Contrast filter, Tonal Contrast, and so on. I usually play around with those and try for what look best for each particular image.
Also, I add more contrast with High Pass Filter for more sharpness on the building and clean it up with Define in Nik Collection. And lastly, crop the image nicely. Here is Before and After.
Tips by Tapanuth Termboonvanich
Hopefully, these tips will help you to create even greater images as it did to me. If you have any question regarding these techniques or any kind of questions, let me know in the comment. If you like my work please visit my 500px page for more. Happy shooting!
500px: https://500px.com/tapanuth
[…] https://www.phototips.cc/shoot-process-cityscape/ http://kelbyone.com/course/mkloskowski_cityscapes/ http://photolisticlife.com/2016/07/24/advanced-techniques-for-creating-and-post-processing-cityscape-photography/ http://www.amateurphotographer.co.uk/technique/shooting-cityscapes-tips-for-urban-photography-70940 http://digital-photography-school.com/10-tips-better-cityscape-photography/ […]